
Welcome to the Aprilaire 4655 Manual Humidistat Wiring guide. This manual provides a comprehensive overview to help you understand and properly install the humidistat wiring system.
It ensures optimal performance‚ safety‚ and efficiency for your home’s humidity control. Follow the steps carefully to achieve accurate and reliable functionality.
Overview of the Aprilaire 4655 Humidistat
The Aprilaire 4655 is a high-quality manual humidistat designed to regulate humidity levels in your home efficiently. It is specifically crafted to integrate seamlessly with HVAC systems‚ ensuring precise control over moisture levels. This device is essential for maintaining indoor air quality and comfort. The humidistat features a straightforward design‚ making it easy to install and use. It is compatible with various heating and cooling systems‚ providing reliable performance. Proper wiring is crucial for its functionality‚ as it ensures accurate humidity sensing and system activation. The Aprilaire 4655 is a durable and energy-efficient solution for managing humidity in residential environments.
Importance of Proper Wiring for Humidistat Functionality
Proper wiring is essential for the Aprilaire 4655 humidistat to function accurately and safely. Incorrect wiring can lead to malfunction‚ reduced efficiency‚ or even system damage. Ensuring all connections are secure and follow the manufacturer’s guidelines prevents electrical hazards and ensures reliable operation. Proper wiring enables the humidistat to accurately sense humidity levels and control the HVAC system effectively. This maintains optimal indoor air quality and prevents issues like mold growth or overly dry air. Correct installation also extends the lifespan of the device and ensures energy efficiency. Always refer to the wiring diagram and safety precautions to avoid errors during installation.
Safety Precautions Before Starting the Wiring Process
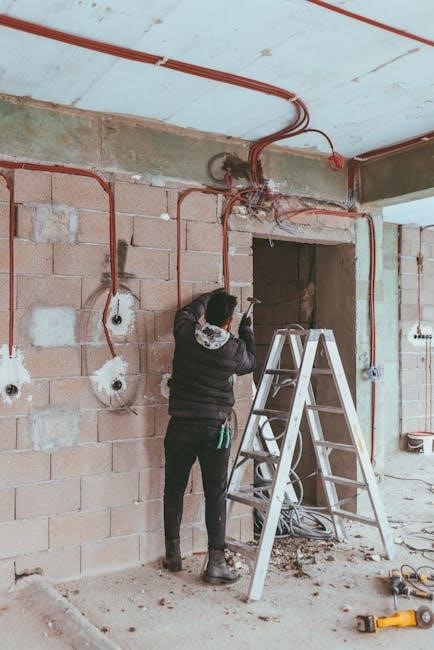
Before starting the wiring process for the Aprilaire 4655 humidistat‚ ensure all safety precautions are taken to avoid potential hazards. Always turn off the power supply to the HVAC system at the main electrical panel. Verify the power is off using a voltage tester to prevent electrical shock. Wear protective gear‚ including insulated gloves and safety glasses‚ to protect against accidental electrical discharge. Ensure the work area is well-ventilated and clear of flammable materials. Never attempt wiring without proper knowledge or tools‚ as this can lead to dangerous situations. If unsure‚ consult a licensed electrician or refer to the manufacturer’s guidelines for safe installation practices.

Product Specifications and Features
The Aprilaire 4655 humidistat is designed with advanced features for precise humidity control‚ ensuring optimal air quality and energy efficiency in your home.
Technical Details of the Aprilaire 4655 Humidistat
The Aprilaire 4655 humidistat is a high-precision device designed to regulate humidity levels accurately. It features a robust construction with a digital interface for easy adjustments. The unit is compatible with various HVAC systems‚ ensuring seamless integration. Its advanced sensors monitor humidity levels in real-time‚ providing reliable performance. The humidistat operates within a humidity range of 20% to 60%‚ making it suitable for different climates. It also includes a built-in delay feature to prevent short cycling of the HVAC system. With its compact design and user-friendly controls‚ the Aprilaire 4655 is an ideal solution for maintaining optimal indoor air quality. Regular calibration ensures long-term accuracy and efficiency.
Key Features of the Aprilaire 4655 Wiring System
The Aprilaire 4655 wiring system offers a streamlined design for easy installation and operation. It includes color-coded wires to simplify connections‚ reducing the risk of errors. The system supports both 24V AC and 120V AC power sources‚ ensuring compatibility with various HVAC setups. Dual-humidity control modes allow for precise adjustment of humidity levels. The wiring system also features a built-in bypass for efficient operation. Advanced safety features include overload protection and automatic shutdown in case of malfunction. These features ensure reliable performance‚ energy efficiency‚ and enhanced safety. The system is also designed for quiet operation‚ minimizing noise during humidity regulation. With its durable construction and user-friendly interface‚ the Aprilaire 4655 wiring system is a robust solution for home humidity control.
Compatibility with Other HVAC Systems
The Aprilaire 4655 humidistat wiring system is designed to seamlessly integrate with a wide range of HVAC systems. Its universal design ensures compatibility with most furnace models‚ air handlers‚ and central heating systems. It works effectively with both gas and electric furnaces‚ as well as heat pumps. The system’s flexible wiring options allow it to connect to various thermostat types‚ including smart thermostats. This compatibility ensures that the humidistat can be easily incorporated into existing HVAC setups without requiring significant modifications. Additionally‚ its standardized voltage requirements make it suitable for different power configurations. This versatility makes the Aprilaire 4655 an ideal choice for maintaining optimal humidity levels in diverse HVAC environments‚ ensuring efficient and reliable performance across various systems.

Installation Requirements and Preparation
Ensure you have all necessary tools and materials for a smooth installation. Prepare the area‚ turn off power‚ and review the wiring diagram before starting.
Necessary Tools and Materials for Wiring
To successfully wire the Aprilaire 4655‚ gather essential tools and materials. You will need screwdrivers‚ pliers‚ wire strippers‚ a multimeter‚ and a wiring diagram. Use 18-22 gauge wires for connections. Ensure all materials are compatible with the system to avoid electrical issues. Proper preparation ensures a safe and efficient installation process. Always refer to the manual for specific requirements. Having the right tools and materials on hand will streamline the wiring process and help achieve optimal performance from your humidistat. This preparation is crucial for a secure and functional setup.
Step-by-Step Preparation for Humidistat Installation
Before installing the Aprilaire 4655‚ ensure the HVAC system is powered off for safety. Locate the installation site‚ typically near the furnace or air handler. Assess the setup to determine if additional components‚ like a saddle valve‚ are needed. Gather necessary tools and materials‚ as outlined in the manual. Review the wiring diagram to understand connections. Ensure the humidistat is compatible with your system. Double-check that all parts are included in the package. Plan the wiring route to avoid obstructions. Turn off the water supply if connecting to a water source. This systematic approach ensures a smooth and efficient installation process.
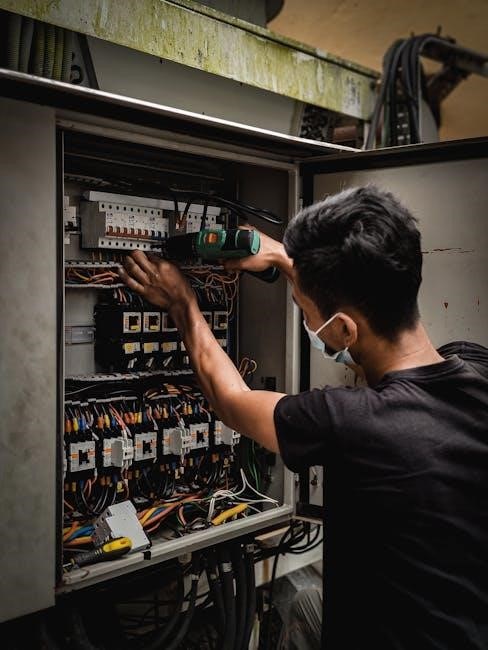
Understanding the Wiring Diagram Layout
The wiring diagram for the Aprilaire 4655 provides a visual representation of connections‚ ensuring proper installation. It identifies terminals for power‚ humidity control‚ and system integration. Color-coded wires simplify understanding: red for 24V power‚ white for heat‚ and yellow for humidifier control. The diagram also outlines connections to the furnace‚ thermostat‚ and water source. Pay attention to labels like R (24V)‚ C (common)‚ G (fan)‚ and W (heat) to ensure correct wiring. For variable-speed systems‚ specific terminals may require additional connections. The diagram also illustrates optional features‚ such as a 24V harness for advanced control. Familiarizing yourself with this layout is crucial for accurate and safe installation‚ preventing potential malfunctions or safety hazards.

Wiring the Aprilaire 4655 Humidistat
Wiring the Aprilaire 4655 involves connecting it to your HVAC system and thermostat. Ensure all terminals are securely fastened and wires are properly routed for safe operation.
Connecting the Humidistat to the HVAC System
Connect the Aprilaire 4655 humidistat to your HVAC system by linking the appropriate wires to the furnace and thermostat. Ensure the humidistat is mounted near the return duct for accurate humidity sensing. Use the provided wiring diagram to identify the correct terminals for connections. Typically‚ the humidistat wires connect to the HVAC system’s control board‚ enabling it to regulate humidity levels effectively. Always turn off the power to the HVAC system before making any wiring connections to avoid electrical shock or damage. Consult a professional if you are unsure about the wiring process. Proper connections ensure seamless communication between the humidistat and your HVAC system for optimal performance.
Wiring the Humidistat to the Furnace
To wire the Aprilaire 4655 humidistat to your furnace‚ start by turning off the power to the furnace at the circuit breaker and unplugging it if possible. Locate the R and W terminals on both the humidistat and the furnace. The R terminal typically represents the 24V power supply‚ while the W terminal is for the heating circuit. Use an 18 AWG wire to connect these terminals‚ ensuring secure connections with wire nuts or soldering for reliability. After connecting‚ restore power and test the system to confirm the humidistat activates the furnace’s humidifier when humidity levels drop. Secure the connections neatly to prevent electrical issues and consider documenting the setup for future reference. Always follow safety guidelines and local electrical codes.
Integrating the Humidistat with a Thermostat
Integrating the Aprilaire 4655 humidistat with a thermostat enhances home comfort by synchronizing humidity and temperature control. Begin by connecting the humidistat’s R and W terminals to the thermostat’s corresponding R and W terminals using 18 AWG wire. Ensure the system’s power is off during this process. Use a common wire to link the C terminals if required. This integration allows the thermostat to signal the humidistat to regulate humidity based on temperature settings. After wiring‚ test the system to confirm seamless operation. Proper integration ensures optimal humidity and temperature levels‚ improving indoor air quality and energy efficiency. Always follow the manufacturer’s guidelines for compatibility and safety. Regularly check connections to maintain performance. This setup is ideal for modern smart thermostats‚ offering advanced control and automation capabilities.
Connecting the Humidistat to a Water Source
To connect the Aprilaire 4655 humidistat to a water source‚ ensure the water supply is turned off. Install a saddle valve on the water line and connect it to the humidistat’s water inlet using 1/4″ tubing. Secure the tubing with compression fittings to prevent leaks. Place the humidistat’s drain line near a floor drain or condensate pump to ensure proper water discharge. Turn the water supply back on slowly and check for leaks. Ensure the water pressure is within the recommended range for optimal performance. Regularly inspect the connections and tubing for any signs of wear or damage. This setup ensures reliable water supply for humidity control‚ maintaining your home’s comfort and indoor air quality. Always follow safety guidelines to avoid water damage or system malfunctions.

Calibration and Setup
Calibrate the Aprilaire 4655 humidistat by adjusting the humidity setpoint to match your desired indoor humidity levels. Ensure the sensor is accurately measuring moisture for proper operation.
Refer to the manual for specific calibration steps to optimize performance and maintain comfort in your home. Proper setup ensures efficient humidity control and system reliability.
Adjusting the Humidistat Settings for Optimal Performance
Adjusting the Aprilaire 4655 humidistat settings involves setting the desired humidity level and sensitivity. Refer to the manual for specific instructions to ensure accurate adjustments. Start by turning off power to the system for safety. Use a screwdriver to access the adjustment dial‚ typically located on the front or side of the unit. Rotate the dial to set your preferred humidity level‚ usually between 30-50% for most homes. Test the system by running the HVAC and monitoring humidity levels. Fine-tune the settings as needed to maintain consistent comfort. Proper adjustment ensures the humidistat operates efficiently and effectively‚ preventing over-humidification or dryness.
Setting the Humidity Levels for Your Home
Setting the humidity levels for your home using the Aprilaire 4655 humidistat involves determining the ideal moisture percentage for comfort and health. Typically‚ a range of 30-50% is recommended‚ but this may vary based on seasonal changes and personal preference. To set the humidity level‚ locate the control dial on the humidistat and adjust it accordingly. Ensure the system is powered off before making any adjustments. For optimal results‚ consider factors such as indoor activities‚ the number of occupants‚ and the presence of plants or pets. Properly set humidity levels will enhance indoor air quality and prevent issues like dryness or mold growth.
Testing the Humidistat After Installation
After installing the Aprilaire 4655 humidistat‚ it’s essential to test its functionality to ensure proper operation. Turn on your HVAC system and monitor the humidistat’s response to humidity changes. Check if the humidifier activates when the humidity level drops below the set point and deactivates when it reaches the desired level. Verify that all wiring connections are secure and functioning as intended. Observe the system’s performance over a short period to confirm consistent operation. If the humidistat does not respond correctly‚ review the wiring connections and settings to identify any potential issues. Proper testing ensures your home maintains optimal humidity levels efficiently and safely.

Maintenance and Troubleshooting
Maintenance and troubleshooting are crucial for ensuring the Aprilaire 4655 humidistat operates efficiently. Regularly clean the humidistat sensor and inspect wiring for damage or corrosion. Check for loose connections and tighten them if necessary. If the humidistat fails to activate‚ verify power supply and settings. Common issues include faulty wiring‚ incorrect humidity settings‚ or malfunctioning sensors. Troubleshooting involves identifying and addressing these problems promptly to maintain optimal humidity control. Always refer to the manual for specific guidance on resolving issues. Proper maintenance and quick troubleshooting ensure consistent performance and prevent potential damage to your HVAC system.
Regular Maintenance Tips for the Humidistat
Regular maintenance is essential to ensure the Aprilaire 4655 humidistat operates efficiently. Clean the humidistat sensor every 30 days to prevent dust buildup. Inspect the wiring for any signs of damage or corrosion and replace worn-out connections. Check the water panel or humidifier filter monthly and replace it as needed. Ensure the humidistat is properly calibrated to maintain accurate humidity levels. If the unit is not in use during the dry season‚ turn it off to conserve energy. Additionally‚ inspect the mounting screws and tighten them if necessary. Regular lubrication of moving parts‚ like the damper‚ can improve performance. Always refer to the manual for specific maintenance recommendations to prolong the lifespan of your Aprilaire 4655 humidistat. Proper care ensures consistent humidity control and prevents costly repairs.
Common Wiring Issues and Solutions
Common wiring issues with the Aprilaire 4655 humidistat include loose connections‚ incorrect voltage supply‚ and short circuits. To resolve these‚ ensure all wires are securely fastened and verify the voltage matches the manual’s specifications. Short circuits can be fixed by inspecting and replacing damaged wires. Corrosion in connectors is another issue; clean them with a soft brush or replace them if necessary. Improper grounding can lead to malfunctions‚ so check the grounding wire connection. If the humidistat fails to activate‚ inspect the circuit breaker or fuse. Always refer to the wiring diagram for accurate connections. Addressing these issues promptly ensures reliable performance and prevents further damage.
Troubleshooting Humidistat Malfunctions
If the Aprilaire 4655 humidistat malfunctions‚ start by checking the humidity setting and ensuring it is within the recommended range. Verify that the power supply is stable and matches the required voltage. Inspect the wiring for any signs of damage or corrosion‚ and ensure all connections are secure. If the humidistat fails to turn on‚ check the circuit breaker or fuse. For issues with humidity levels‚ ensure the sensor is clean and free from obstructions. If the problem persists‚ consult the wiring diagram to identify potential shorts or open circuits. In some cases‚ replacing faulty components like the sensor or relay may be necessary. Always follow safety guidelines when troubleshooting electrical systems.

Advanced Configurations and Customization
Explore advanced wiring setups to tailor the Aprilaire 4655 to your specific HVAC needs. Customize settings for enhanced performance and seamless integration with smart home systems today.
Integrating the Humidistat with Smart Home Systems
Integrating the Aprilaire 4655 humidistat with smart home systems enhances control and convenience. By connecting to platforms like SmartThings or Nest‚ users can monitor and adjust humidity levels remotely. This integration allows for seamless automation‚ ensuring optimal indoor air quality without manual adjustments. Advanced features such as voice control and scheduled humidification can be enabled‚ providing a modern and efficient solution for home comfort. Ensure compatibility with your smart home hub before installation and follow the manufacturer’s guidelines for a smooth setup. This feature-rich integration elevates the humidistat’s functionality‚ making it a valuable addition to any smart home ecosystem.
Customizing Wiring for Specific HVAC Needs
Customizing the wiring for your Aprilaire 4655 humidistat allows for tailored integration with your HVAC system. This ensures optimal performance based on your home’s specific requirements. For multi-stage furnaces or variable-speed systems‚ additional wiring configurations may be necessary to synchronize humidity control with heating and cooling cycles. Always consult the manufacturer’s guidelines for compatibility and recommended setups. If integrating with zoning systems‚ ensure proper communication between the humidistat and zone controllers. Custom wiring may also involve connecting to auxiliary sensors or thermostats for enhanced functionality. Proper customization ensures seamless operation and maximizes energy efficiency‚ making your home’s climate control system more adaptable and responsive.
Upgrading the Humidistat for Enhanced Performance
Upgrading your Aprilaire 4655 humidistat can significantly enhance its performance and integration with modern HVAC systems. Consider replacing the humidity sensor with a more accurate‚ modern version for improved control. Additionally‚ updating the control board or wiring can allow for advanced features like smart home integration. Ensure compatibility by selecting aftermarket parts designed for the Aprilaire 4655. For a seamless upgrade‚ follow the manufacturer’s guidelines to maintain compatibility and avoid issues. Always prioritize safety by disconnecting power before starting any work. Weigh the costs and benefits‚ as upgrades can lead to energy efficiency‚ lower utility bills‚ and enhanced comfort. If unsure‚ consult a professional for assistance.
Wiring Diagrams and Schematics
Wiring diagrams and schematics provide a clear visual guide for installing and troubleshooting the Aprilaire 4655 humidistat. Color-coded wires and detailed layouts ensure accurate connections and safe installations.
Understanding the Aprilaire 4655 Wiring Diagram
The Aprilaire 4655 wiring diagram is a detailed visual guide that illustrates the electrical connections and components of the humidistat system. It includes symbols‚ labels‚ and color-coded wires to simplify installation and troubleshooting.
By examining the diagram‚ you can identify terminals‚ connections‚ and the flow of electricity through the system. This ensures that all components‚ such as the humidistat‚ furnace‚ and water source‚ are properly linked.
Understanding the wiring diagram is essential for accurate installation and maintaining system performance. It helps users and technicians diagnose issues quickly and make necessary adjustments for optimal humidity control in your home.
Interpreting the Schematic for Accurate Installation
To ensure accurate installation‚ interpret the Aprilaire 4655 schematic by identifying each component and its connections. Start by locating the humidistat‚ furnace‚ and thermostat terminals;
Match the color-coded wires to their respective terminals‚ as indicated in the diagram. Verify the power supply connections and ensure all safety precautions are followed.
Double-check the wiring sequence to avoid misconnections. Proper interpretation of the schematic guarantees the system operates efficiently and safely.
Using the Wiring Diagram for Troubleshooting
The wiring diagram is an essential tool for diagnosing issues with your Aprilaire 4655 humidistat. Start by comparing the diagram with your actual setup to identify discrepancies.
Check for loose connections‚ incorrect wire placements‚ or damaged wires. Refer to the diagram to verify that all terminals are connected as specified.
Use the diagram to trace the circuit flow and isolate potential fault points. This methodical approach ensures efficient troubleshooting and minimizes downtime for your system.
By following the wiring diagram‚ you can pinpoint and resolve issues effectively‚ ensuring optimal performance of your humidistat.
Safety Guidelines and Best Practices
Always turn off power before starting. Use a voltage tester to ensure safety. Follow the manufacturer’s instructions carefully. Wear protective gear like insulated gloves.
Electrical Safety Tips for Humidistat Wiring
When working with the Aprilaire 4655 humidistat wiring‚ prioritize electrical safety to avoid hazards. Always disconnect the power supply before starting any installation or repair. Use a voltage tester to confirm that no electricity is present. Avoid overloading circuits‚ as this can lead to electrical fires or system malfunctions. Keep the work area dry to prevent shocks or short circuits. Follow the manufacturer’s instructions and local electrical codes. Use properly rated wires and connectors to ensure safe connections. Never bypass safety devices like circuit breakers or fuses. If unsure‚ consult a licensed electrician to handle the wiring. Safety is paramount to protect both you and your system.
Best Practices for Humidistat Installation
For a successful Aprilaire 4655 humidistat installation‚ adhere to best practices. Mount the humidistat in a location with consistent humidity levels‚ avoiding areas near air vents or direct sunlight. Use the provided mounting template for accurate placement. Ensure the device is level to maintain proper calibration. Follow the wiring diagram precisely‚ using the correct wire gauges and connections. Test the system after installation to ensure it operates smoothly. Regularly check and replace the sensor to maintain accuracy. Keep the area around the humidistat clean to prevent dust buildup. Proper installation ensures reliable performance and extends the lifespan of the device. Always refer to the manual for specific instructions tailored to your setup.

Avoiding Common Mistakes in Wiring
To ensure a reliable installation‚ avoid common wiring mistakes. Always turn off the power supply before starting work to prevent electrical shocks or damage. Verify wire connections match the Aprilaire 4655 wiring diagram exactly—misidentifying wires can lead to system malfunctions. Avoid using damaged or inappropriate wire gauges‚ as this may cause inefficiency or safety hazards. Double-check that all connections are secure and not loose‚ as this can disrupt proper functionality. Never skip steps outlined in the manual‚ as shortcuts may result in improper operation. Additionally‚ ensure the humidistat is installed in a location with stable humidity levels for accurate readings. By following these guidelines‚ you can avoid common pitfalls and ensure a safe‚ efficient setup.
Ensure all connections are secure and settings are accurate. Verify proper functionality and refer to the manual for future adjustments. This ensures safety and optimal performance.
Final Inspection of the Wiring Setup
After completing the wiring‚ perform a thorough inspection to ensure all connections are secure and correctly configured. Verify that the wiring matches the Aprilaire 4655 manual’s specifications.
Check for any signs of wear‚ loose connections‚ or improper wire routing. Ensure the humidistat is properly mounted and aligned with your HVAC system. Turn off the power before inspecting.
Use a multimeter to test for short circuits or incorrect voltage readings. Confirm that all terminals are tightly secured and that the wiring diagram has been followed precisely. Finally‚ ensure the system is balanced and functioning optimally.
Ensuring Proper Functionality of the Humidistat
To ensure the Aprilaire 4655 humidistat operates correctly‚ verify that all wiring connections are secure and match the provided wiring diagram. Power up the system and test humidity levels to confirm accurate responses.
Check for any error indicators or unusual behavior. Ensure the humidistat is properly calibrated and synchronized with your HVAC system. Monitor performance over several days to confirm consistent operation.
Verify that the humidistat activates and deactivates appropriately based on set humidity levels. Ensure all safety features‚ such as high-limit shut-offs‚ function as intended. This ensures reliable and efficient humidity control for your home.
Recommended Follow-Up Maintenance Schedule
Regular maintenance ensures the Aprilaire 4655 humidistat continues to function efficiently. Schedule monthly inspections of the wiring and connections to prevent corrosion or loose contacts.
Clean the humidistat sensor every two months to remove dust or debris that may interfere with accurate humidity readings. Replace the water panel annually or as recommended by the manufacturer.
Check and calibrate the humidistat settings seasonally to account for changing humidity levels. Ensure the drain system is clear and functioning properly to avoid water damage or mold growth.
By following this maintenance schedule‚ you can ensure reliable operation and extend the lifespan of your Aprilaire 4655 humidistat.